3D Puff Embroidery Process Explained
3D Puff Embroidery Process Explained
If you want your logo to literally stand out on a piece of custom apparel, then 3D embroidery might just be the customization method for you. 3D puff embroidery adds dimensional depth to your design by raising your logo from the surface of the product with an added layer of foam. Check out our complete 3D puff embroidery capabilities here!
How Does 3D Embroidery Work?
3D puff embroidery is very similar to traditional embroidery in most ways, just a bit more difficult. The first few steps are all the same as normal embroidery, but there are a few additional steps added on at the end to achieve the 3D look.
Step by Step Guide to 3D Puff Embroidery
- Digitize your logo and prep the embroidery machine – your company logo or custom design is digitized using graphic design software and saved as a DSB or DST file depending on the embroidery machine that will be used. The file is then transferred to the embroidery machine where it will be read after the design elements like orientation and thread color sequence are entered. The only thing that’s different from normal embroidery in this step is that the machine needs to be set to automatic/ manual mode.
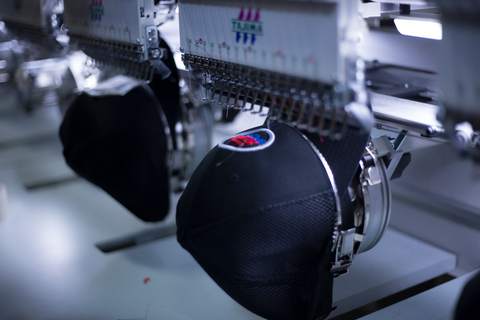
- Position the product on an embroidery machine – we use a special embroidery hoop to load and secure your product into the embroidery machine.
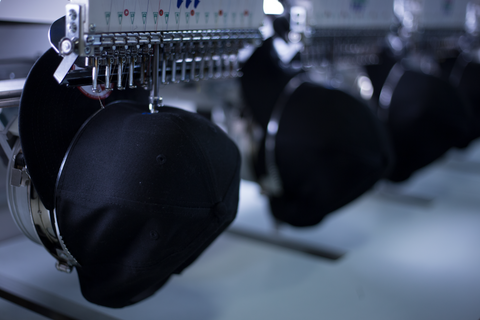
- Embroider the outline – allow the embroidery machine to work it’s magic on the outer layer of your design. This will be the base layer of your design, not the 3D portion.
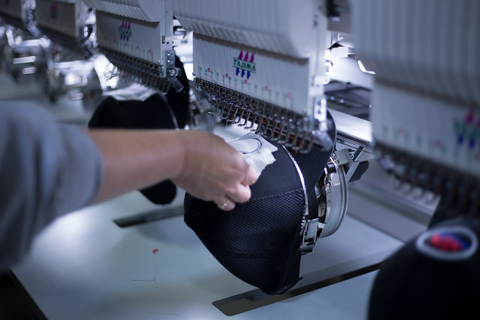
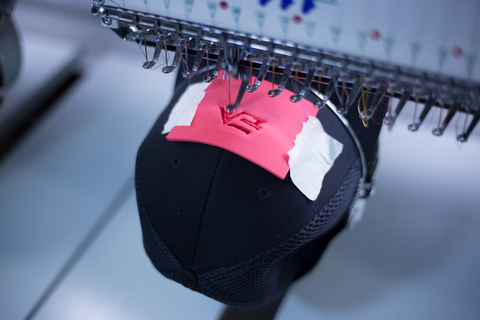
- Place the foam over the design – the embroidery foam, or “puff” is placed directly over the embroidered outline of the design and is taped to the garment. Next, we press start and the embroidery machine goes to work on sewing the foam to your product.
- Remove excess foam – the unused outside layer of puff is carefully removed to reveal your custom 3D logo.
What Equipment is Needed for 3D Embroidery?
- Computer & Design Software – this is used to digitize your company logo or custom design before transferring the design file to the embroidery machine.
- Foam – this is embroidered on top of your original outline to give your logo or design that 3D look.
- Commercial Embroidery Machine – this can be the same machines that are used for standard embroidery. Embroidery machines come in a variety of different sizes. Larger commercial embroidery operations can have embroidery machines with up to 38 heads containing as many as 15 needles each.
- Embroidery Hoops – this is what you stretch your fabric over or place your hat on to secure it in place before locking it into the embroidery machine. The embroidery machine actually moves the hoops during the embroidery process to create your design, not the needles!
-
Embroidery Thread – you can’t have embroidery without thread! Make sure you have a wide range of thread colors and thread types. To see the thread colors offered by Merchology check out our Pantone Thread Color Matching Chart.
Next Steps
Now that you know how it works, go ahead and start shopping for custom hats or apparel with your 3D embroidered corporate logo. Still not sure if 3D puff embroidery is the right customization technique for you? Check out our complete Guide to Custom Decoration Methods or contact us to get all of your questions answered!